Tuesday, February 28, 2012

Random Rambling #3: A Bag O’ Socks

I threw out a bag of socks today!  This is going to sound crazy or maybe not, but I’ve had a laundry basket full of socks for a few years now.  Not kidding.  YEARS!  Ridiculous, I know.  I’d find a space of time and tackle some of them, only to leave the rest for another day.  And the funny thing is, we have socks coming out of our ears, but we can never find them, so I keep buying them.  They were probably all in that basket.  Anyhow, today was the day I conquered the socks!  My husband told me forever to just throw them away.  I couldn’t bring myself to throw away an entire laundry basket of socks, it just didn’t seem right.

Today, I let it go!  Okay, for the most part.  I did sort through the rest of the laundry basket earnestly looking for matching socks.  In the end, I came up with a bag of socks to donate and finally a bag of socks to chuck and a bag to keep (hey, that’s 2 bags for my 40 bags quest).  The funny thing is I actually found baby socks in this bin.  Again, RIDICULOUS!

I have to say, I know I’m not the only one, which makes me feel better.  I actually ran into a woman at Target the other day.  We were both looking at the same bin.  She asked me what I was going to use it for, and I told her socks.  So then we started talking about both of our battles with socks.  She told me she had an entire basket of socks and her husband told her to throw them away too.  The lady probably thought I was crazy because I got so excited when she told me that.  It’s just nice to know I’m not the only one.

Monday, February 27, 2012

The Wall of Awesomeness

Sometimes I make the mistake of trying to include my kids on a project by asking their opinions or giving them a choice.  If I know exactly what I want to do, why do I ask?  Why?  So I asked my daughter if she wanted zigzags or polka dots on her display board (referring to the bathroom vanity doors from this post) and the answer, of course was neither.  She had her own idea.  She drew it up and presented this to me.  

IMG_2306

Not exactly what I had in mind and that would mean more steps in painting and creating a template, etc. Did I mention I’m a lazy DIYer?

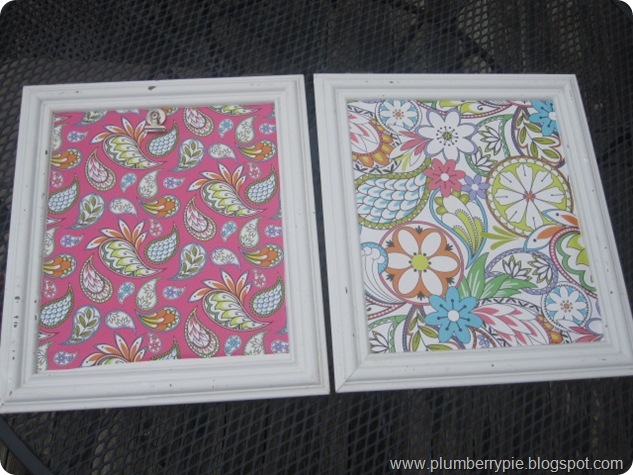
So of course I try to convince her of another option, why not some cool wrapping paper?  I found two wrapping papers that were fun and colorful with the hopes that she would like them.  Look how cute they are!  Aren’t they?!  And so much easier than trying to paint her design, just slap that paper on with some modge podge and call it good!

IMG_2309

IMG_2307

IMG_2308

I knew she would say, “no” and she did.  Yes, I’m the mom and I could pull rank, but I hate to shut down her creativity on something that really doesn’t matter in the grand scheme of things.

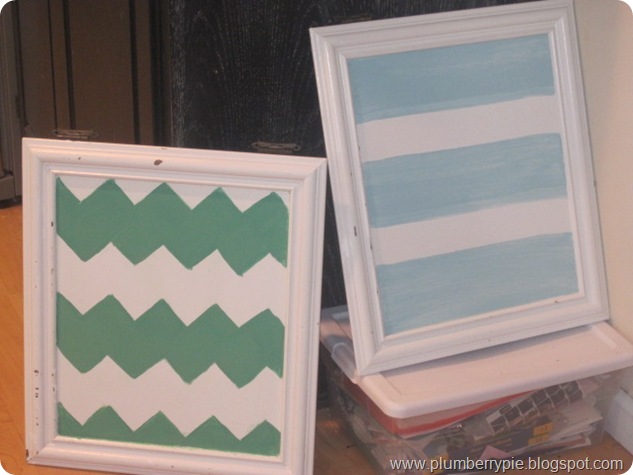
So Friday afternoon, I painted the boys’ boards while they were at school.  My vision was crisp chevron.  I started to tape and apparently I don’t have the skills to create a zigzag with painters tape, so I removed the tape to start again and it took the white paint off.

IMG_2311

Ugh.  Again, lazy DIYer here, did not want to repaint the white so I decided to do that board in stripes to cover the mishap.  And knowing the tape would potentially remove the white paint, I conceded to a free hand, imperfect look.

IMG_2314

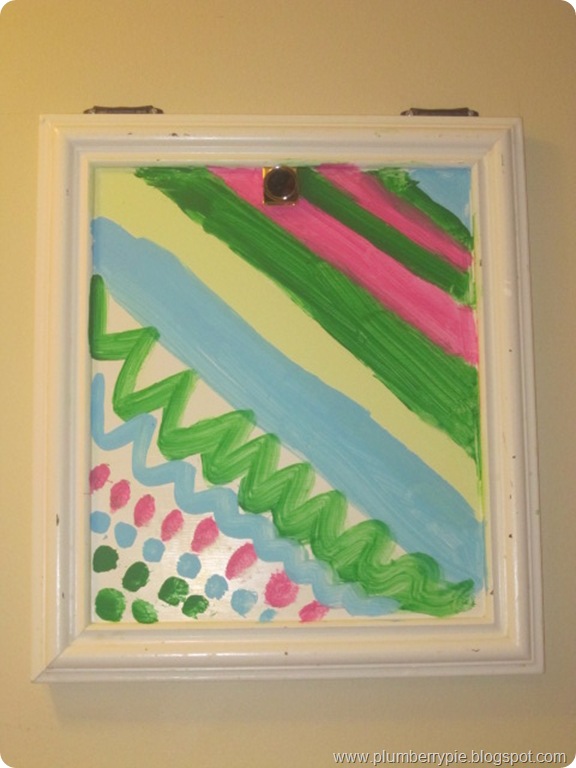
In the end, I let my daughter paint her own freehand as well.  She soon discovered that her master plan was not quite working out and she came up with something completely different.

IMG_2321


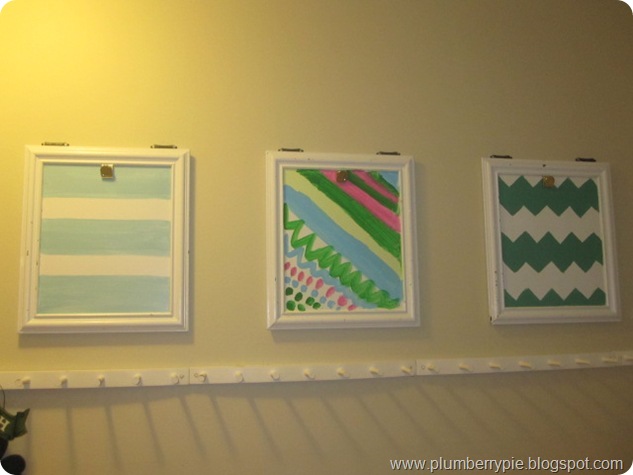
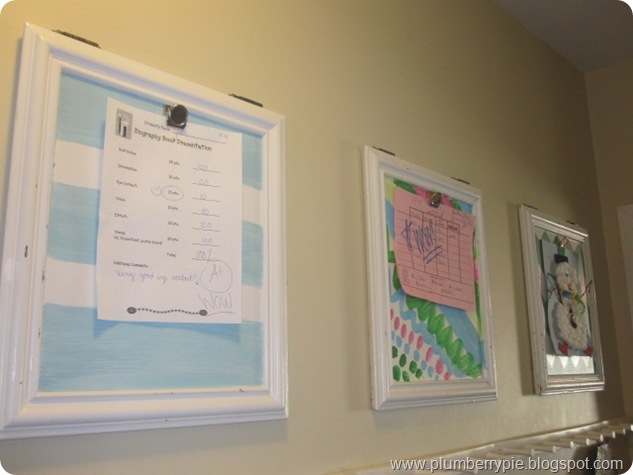
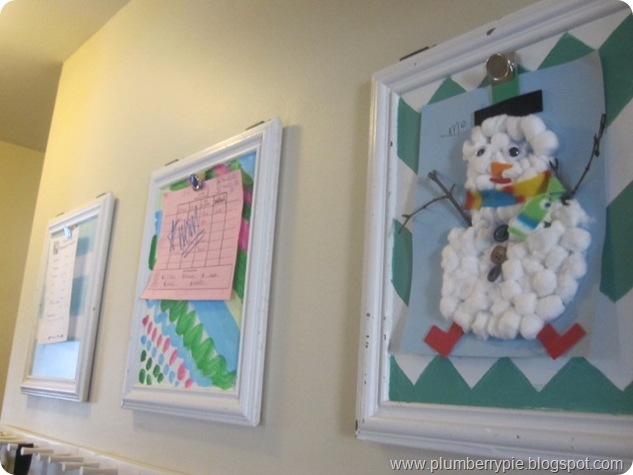
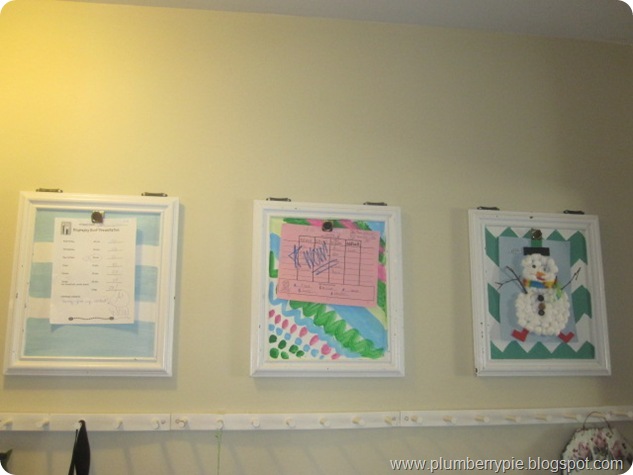
And here they are in their glory.

I hereby name this the Wall of Awesomeness.

IMG_2320


IMG_2328

IMG_2327

IMG_2329

I pledge to rotate special achievements instead of collecting a mad mess of clutter.  My hope is for this to truly honor their achievements and give them pride in their hard work.

I am so happy to check this off my To Do List and even happier that this project cost me $0!!  The doors came off the vanity, used the hinges to hang them and used paint and magnetic clips we already had.  I love how they add life and color to an otherwise boring hallway.  Cannot beat that!

And as it turns out, I may have two more vanity doors to do because I just noticed the hinge has ripped away from the wood on the half bath vanity.  Stay tuned.

Friday, February 24, 2012

Accidental Home Updates

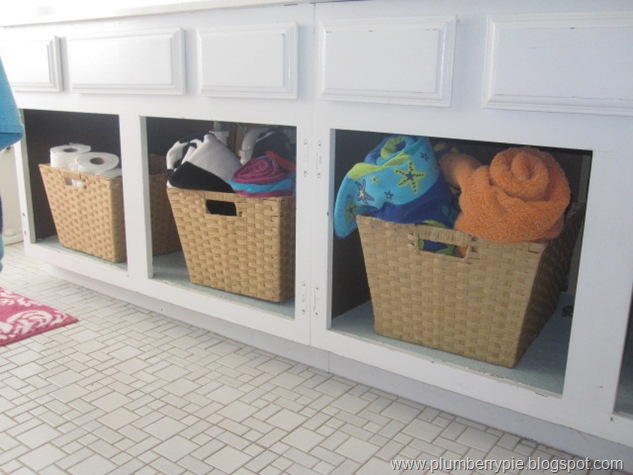
Some of my home updates are a direct result of some kind of mishap at my house. And the person connected to the story is usually my youngest little guy. About two years ago, he decided to use the bathroom cabinet door as a step stool. BOOM! Child on the floor, cabinet door hanging by a thread and wood shredded. The vanity is old so it was not worth trying to replace the door. The best thing I could do without buying a whole new vanity was to take off all the doors. So that was the accidental "update" to the kids' bathroom vanity.
 
IMG_2135

The surviving doors were sent to the basement awaiting their new life because I had an idea. Of course it took me two years to get to it, but that's the story of my life. Two years ago, I thought my idea was so original and clever, then I came to discover a million other people in blogland are just as clever as I am. Maybe it was original two years agoSmile.  So the idea was to make the doors into display boards, a revolving clipboard to showcase my kids' special achievements.

The refrigerator was the home for this until we got our stainless steel fridge - not magnetic. Part of me was glad because it became a clutter collector as every surface in my house does. So I moved it all to my garage entry door which turned into the new clutter collector.


Since I'm on the quest to cut the clutter, it was time to bring the doors up from the basement and tackle this project. Besides time and laziness, it takes me a while to do the projects I dream up because of my inability to decide among the endless ideas flying around in my head. Here are some of the ideas that were monopolizing my brain:
  1. Do I make it a chalkboard, cork board or magnetic board?
  2. Do I paint the frame a color or leave it white?
  3. Do I put them on the playroom wall, the garage entry wall or the laundry room wall?
  4. Do I put permanent artwork in it?
  5. Or do I go a completely different route and use the doors as molding on my flat front island instead?
My Original Plan:
Use metal flashing from the hardware store for the inset part of the door, paint it with a pop of color and hang it by the garage entry. Then I went to the hardware store only to find out that the metal flashing  was $20-$24 per sheet... and I needed three! I was looking to make this a very low cost trash to treasure project, so I changed my plan.
New Plan:
  • Feed my obsession for all things chevron and zigzag by painting the boards a zigzag pattern.
  • Glue clip on board.
  • Hang boards on the wall by the hinges already on the doors.
So now that I've shared all that, I have to leave you hanging because I haven't finished the boards yet.  I mentioned in one of my earlier posts that part of the reason I started blogging was to hold myself accountable.  That is exactly why I posted this, to make me actually check this off my To Do List!  Can’t wait to show you how it turns out!

Happy Friday!

Kim

Wednesday, February 22, 2012

$5 Artwork

 $5 on one sheet of wrapping paper – no way!

$5 on a piece of artwork, um – okay!

I ran into a fancy gift card shop at the mall the other day looking for something else, but instead I found this…

 IMG_2298

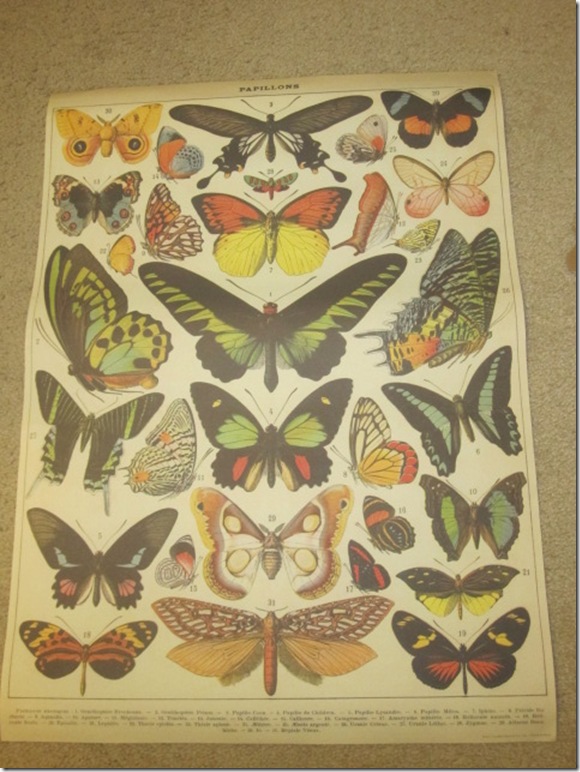
Butterfly prints have been catching my eye lately, but I didn’t really want to spend the bucks on something that may just be another passing phase in my ever-changing decorating style.  So when I saw this wrapping paper (seriously, could you even bring yourself to wrap something in this?), I snatched it up.

IMG_2299

There are about three places it might go.  First, I need to find a frame that keeps this a budget friendly find.  I’ll be sure to let you know what I come up with.

What little treasures have you stumbled upon lately?

Monday, February 20, 2012

40 Bags in 40 Days

If you've already fallen off your New Year's Resolution to get organized, I've got just the idea to get you back on track!  I stumbled across the concept of the 40 bags in 40 days challenge on Pinterest, which led me to the fun and fabulous Bec over at Little Lucy Lu.  And I'm so glad it did. 


When you visit Bec at Little Lucy Lu you will be greeted by her bubbly and candid personality, along with some great ideas. So fun.  I've only just recently met Bec through blogland, but she is truly sweet and has been so helpful to me on my blogging adventure!  Make sure to check out Little Lucy Lu, especially her laundry room and craft room - good stuff!!

So on to the 40 Bags 40 Days concept.  The concept is to fill a bag every day for 40 days to purge your house (good timing with Lent coming up this week).  It will be such a relief to clear the clutter!!  I cannot wait to get started.  In fact, I got a jump start this weekend in the kids' playroom!  I was in the cleaning groove, so I had to go with it!  Ended up with a grocery bag of trash, half a bag of paper to be recycled and a huge bin of toys to be donated!  Depending on the space, I'm sure I will have bags as big as garbage bags and bags as small as  grocery bags, but a bag none-the-less.  So are you with me?  Let's get a purging!!  Here's my list of 40 bags...could change of course, but this is what I'm thinking....

  1. Laundry Room
  2. Cubbies
  3. Half bath vanity
  4. Craft/gift closet
  5. Hall cleaning closet
  6. Coat closet
  7. Living room side of Playroom
  8. Dining room side of Playroom
  9. Lower craft cupboards
  10. Upper craft cupboards
  11. Craft drawers
  12. Junk drawer by sink
  13. Upper cupboard to right of sink
  14. Pantry
  15. Refrigerator
  16. Spare room closet - that may take a week to go through and give me about 10 bags
  17. Kid's bathroom closet
  18. Erin's closet
  19. Jake's closet
  20. Kyle's closet
  21. Master closet
  22. Erin's shelves
  23. Old DVD's
  24. Master bath vanity
  25. Basement shelves - don't even want to go there
  26. Car
  27. Purse
  28. Nightstand
  29. Magazine bin
  30. Office - desk
  31. Office - shelf 1
  32. Office - shelf 2
  33. Box that's been sitting in my office I think since we moved in.
  34. Box 2, same thing.
  35. Box my mom brought over from her house
  36. The other box my mom brought over from her house
  37. Hand me down bags
  38. Table in the basement
  39. Trunk in the family room
  40. Bins in playroom
Honestly, I don't know if 40 days is enough for my house, but it's probably all I can take.  Boy, the Salvation Army is going to love me when I show up with 40 bags!

Sunday, February 19, 2012

Blog Hop at Making It Feel Like Home

Hi guys! Hope you're having a great Sunday!  I just jumped on a blog hop over at making it feel like home .  Just wanted to share in case you wanted to jump on too.  Just a great way to share your blog and make new friends at other blogs too!  Check it out!

Come back tomorrow for a great idea to get back on the organization bandwagon!  It's a fun one!

Pamper yourself today before the grind of the week begins!
Happy Sunday!
Kim

Friday, February 17, 2012

Sister's Demo & Reno & a Woo Hoo!

First I have to give a little woo hoo!  My Tame the Bed Head Beast post was featured as having the most visits to the 30 Handmade Days Pity Party last week.  This is the first time I've been "featured" so I'm a little giddy to say the least.  Anna at Ask Anna also did a shout out for this post on her FB page and Bec at Little Lucy Lu gave me a shout out for the Cheat the Class Treat post on her FB page.  So it was an exciting two weeks for Plumberry Pie!  Okay, I'm done.  Just a little excited!  So now to the real post for the day...my sisters demo and reno.

Since I don't have any major projects happening at my house, I thought I'd share what's happening at my sister's.  I've found that no matter the size of your space, if you don't have a good layout, then any space can seem dysfunctional.  My sister's house is just under 1,000 square feet and the layout wasn't the best.  While her living room is a good size, her kitchen is was closed off and tight.  So she decided to start knocking down some walls!  Things are still in process, but here's how far she's gotten....

BEFORE
- the wall dividing the kitchen and living room -

AFTER
- down to the studs -

AFTER, AFTER
- no studs, new header -

She also wanted to open up the entry way by getting rid of the half wall and closet.

BEFORE
AFTER
- view from the kitchen -

AFTER with her cute dog

She also plans to redo the floors and gut and redo the kitchen, but there's that thing called money.  So for now, she'll finish off the walls and enjoy a wide open space.  I will make sure to keep you up-to-date on her progress because who doesn't love a good before and after?!

Happy Friday!
Kim

Thursday, February 16, 2012

Dear Dad

Dear Dad,

I can't believe it's your 79th birthday today.  You have had many adventures, challenges and good times throughout your life!  Alzheimer's may slowly steal away your memory, but know this, we will never let you forget how much you are loved and how special you are.

Here are a few of my favorite things about you...
...how sweet you are with kids.
...how when you love something, you've got to share it with everybody.
...how much you enjoy music and a good show.
...how a good sports game, any sport, gets you so excited.
...how you appreciate a good joke and a good laugh.
...when you get that twinkle in your eye and smirk on your face when you tell a joke.
...how you are always ready to lend a hand, even if you really shouldn't:).
...how you've always supported us.
...how you tell us how awesome we are. Who do you think we learned it from?
...how you taught me through your actions to help others with open arms and generosity.
...how you make everyone you meet feel special and loved. 
...how you would visit people (sometimes people you barely knew) in the hospital so they felt loved and cared for.
...I love that you are the cookie man.  I can't tell you how many times I heard someone say, "When I was in the hospital, your dad stopped by with a box of cookies."  It was your trademark.  I would always giggle about it, but also be beaming inside because of how your thoughtfulness touched so many people.


I love how everyone remembers and loves you because of who you are.
...a friend, a husband, a cousin, a support system, a lending hand and most importantly...

You are my Dad and I am so proud of that.


Never forget that YOU are awesome and we all just love ya!
And as you would say, God Bless Ya!
I love you, Dad!
Happy Birthday!
Kim

Wednesday, February 15, 2012

Homemade Laundry Detergent

Before you say that you'll never make your own laundry detergent, wait.  I said that to myself the first time I saw it pinned on Pinterest.  After I came across it a few more times, I decided to look into it further.

Basically, if you can open a box and empty it, then you can do this within minutes and you probably won't need to do it for another year!  And....and, and, and, it's super cheap!  Thinking about trying it now?

First I will tell you my favorite store bought detergents.   I love Method Fresh Air or Clorox Green Works.  They are both eco-friendly and smell so good!   However, I don't love the price or how quickly I run out, so that is why I decided to try homemade laundry detergent.  It's still green and it still has a nice fresh scent, why not?

There are a few variations of recipes out there, so I pinned a bunch on my How To... pinboard on Pinterest.  There's even a liquid version.  While I'm partial to liquid detergents, there was more work involved (boiling it).  Call me lazy, but I just didn't want to boil my laundry detergent, plus the powder just looks too cute in a container on your washer.   I came across this particular recipe several times and it seemed easy enough, so I went for it.

Here's What You Need:
4 lb 12 oz box Borax (laundry aisle)
3 lb 7 oz. box super washing soda (laundry aisle)
4 lb box of baking soda (baking aisle)
3 bars of Fels-Naptha soap, Zote or Ivory (Fels-Naptha found at my ACE Hardware store)

** Many of the recipes called for OxiClean as an optional ingredient, but I decided against it because I only use OxiClean every now and then.  Some said to use 2 small containers (3.5 lbs. total) of Oxiclean or 1 cup.  I guess that's up to you.


STEP 1:
Get yourself a tall kitchen bag and line a small garbage can or bucket.


STEP 2:
Grate the bar soap.  I used a parmesan cheese grater, but if you have a good blender or food processor and you think it can handle a block of soap, I recommend that.  I admit, this part was a pain and will take you more than a few minutes if you have to do it by hand.  My blender can't even blend a smoothie, so I had to do it the old fashioned way.  It actually looks like cheese, doesn't it?


STEP 3:
Layer the ingredients. Bar soap, Borax, mix. Bar soap, baking soda, mix.  Bar soap, washing soda, mix.  I mixed some with a spoon and even my hands, but also took the bag out of the garbage can and turned it back and forth and upside down while holding the top closed.


STEP 4:
Put it in a sealed container, otherwise if it gets damp, it will clump together to make a big chunk.
I learned that the hard way, but that's another story.

I chose this cute 1 1/2 gallon glass canister from Target.  It will fill all the way to the top and leave a little extra.  I just put the extra in a mason jar.  There was a 2 1/2 gallon canister, but it just looked too big on my washer, so I opted for a bit of overflow and the smaller container.


STEP 5:
Cute it up if you want.  If I have to do laundry, it makes me feel better when my surroundings are cute.  I used the black contact paper I got for my mason jar drink cups and a white marker to write "laundry".  I've since added "2 scoops" for my husband.  He said he wouldn't remember.  That made me laugh.  I also got a cute stainless steel coffee scoop for my scooper.


STEP 6:
Do laundry.
You will only need 2 tablespoons per load.
I've read this will last you about 9-12 months!
How great is that?!

Cost Breakdown:
Baking Soda                             $4.49
Washing Soda                          $4.79
Borax                                        $6.49
Fels Naptha Soap ($1.79 x 3)  $5.37
TOTAL                       $21.14 for a year supply! Not bad!

Side Notes:
Yes, you can use it in an HE washer and yes, you can put it in the dispenser.  I noticed that some people mentioned that you need to put it directly in the drum or dissolve it first.  I'm a rebel, so I tried it in the dispenser set on powder.  Don't know if all HE washers have a setting for liquid and powder, but mine does.

It dissolved completely on its own.  Haven't had a problem.

Also, from what I've read, these ingredients work with hard water.

This detergent does not get sudsy, but bubbles do not do the cleaning, that is just added for fun.

I've only been using it for a week, but it's working great so far.

Do I need to write, "use at your own risk" or "results may vary"? I don't know, I just noticed others wrote that.  You won't send me nasty notes if you don't like it, right?  I hope not.

If you're hesitant to make a year's supply without trying it out first, I found this smaller quantity recipe.  Sorry I can't find the link I got it from, but here is what I wrote down:

1 bar Fels-Naptha bar soap
1 cup Borax
1 cup washing soda
1/4 cup baking soda

Happy Washing!
Kim

Tuesday, February 14, 2012

Kids' Valentines

So we finally finished our Valentines in our typical last minute fashion.  They weren't hard to do, just better to do them in more than one night.  I told myself we needed to do them over the weekend, but sure enough we waited.


So my little man chose the Love Bugs Valentine we found over at dandee, free printables and all!  We saved all the butterflies and cute bugs for the girls and did the more gruesome ones for the boys.  Not sure that they will get handed out that way in the end,
so I apologize to any girl who gets a scorpion or spider.


I mentioned my daughter wanted to do friendship bracelet valentines from my last  Valentine post, then she saw the photo Valentines and wanted those too.

So we combined them.
We had a good assembly line going.
She made the bracelets, I put them on the card.
Probably took us about two hours.


Once my oldest saw the Cupid's arrow through the head Valentine
from Landee See Landee Do, he was sold immediately.
Since it's his last year doing Valentines, I was more than happy to make these for him.
Cannot believe he's going to middle school next year...YIKES.


Thanks to all the creative geniuses out there who were nice enough
to share their adorable and clever ideas!
Now I look like I'm a creative genius too.

 
Happy Valentine’s Day!
Kim

Monday, February 13, 2012

It's 8:00, oh @#$&*!!

When I woke up this morning, I looked at the clock and decided that I'd shut my eyes just for a few more minutes.  Next thing you know I wake up in a panic at 8:00 AM! The bus comes at 8:23! The kids still need to eat, I still need to make lunches, make sure everyone has everything and make sure my little man actually goes potty before he leaves!  Of course he decides he's going to boycott any food I give him, so I actually have to pull out the big guns and put some privileges on the line to get him to eat.  If it were lunch or dinner, fine, don't eat, but as they say, "breakfast is the most important meal of the day."  So yes, I threaten games and toys to fill the belly.  It worked!  Victory!  Kids are fed, dressed and ready to go with not a minute to spare.  Fewww!

It was one of those mornings.  I was running around, but my body was still sleeping.  Just a bumbling idiot trying to get the day started.  It's an hour later and I still don't feel awake yet.  I'm hoping a shower cures me.

Today's post was actually suppose to show you what the kids ended up doing for Valentine's Day, but it would help if I actually had the Valentines to show you.  I haven't finished them yet.  So I guess,  I will show you tomorrow.

Hope your day started more smoothly than mine!

Kim

Friday, February 10, 2012

Sweets for Your Sweetie

I've got a super easy, a bit messy, but very yummy treat for you today.  Over the holidays, my husband received these cookies from a co-worker and I could NOT stop eating them!!  Seriously.  They were so addictive.  And when something's that good, I need to share it.  Thanks, Ruth, for letting me share your cookie recipe today.

You can easily change these cookies for each season just by changing the sprinkles.  So here's my Valentine's Day version of the Chocolate & Peanut Butter Cracker Cookies.

What You Need:
Ritz crackers
Peanut butter
Chocolate melts
Sprinkles


Step 1:
    Spread a thick layer of peanut butter onto the cracker to create a sandwich.  In my opinion, the thicker the better.  It gives a better balance to offset the chocolate's sweetness.

    Oh, and I put some on sucker sticks for fun.


I also tried Peanut Butter Ritz Bits as a snack size version, however, I will tell you right now, the big ones are better.  The mini's just don't have enough peanut butter to balance out the sweetness, but that's just me.

Step 2:

Melt chocolate with double boiler or microwave.
I did the microwave.
(follow directions on chocolate package)


Step 3:

Lay out a sheet of wax paper or cupcake liners in a cupcake pan.

Step 4:

Dip crackers in chocolate.
Use tongs to remove and set them on the wax paper or in a cupcake liner.
Make sure to put your sprinkles on before they harden.


Like I said, a bit messy.

Get creative with your sprinkles.
I also used a squeeze bottle full of colored chocolate for x's and o's, stripes and polka dots.


I know, the drips on my stick aren't too pretty.  It was my first time doing such a project.  Oops.


Package them up and give to someone you love.


Or just eat them with someone you love!

Happy Friday!
Kim
Related Posts Plugin for WordPress, Blogger...